Uncategorized
Roadbook Navigation Explained
Apr
Thinking of doing your first-ever cross-country roadbook navigation rally, but the idea of navigating with a paper scroll filled with weird little symbols terrifies you? You’re not alone. Because there aren’t many decent tutorials and quick explainer videos out there, roadbook navigation may appear like some complex art or downright dark magic if you’ve never done it before.
The good news is, it’s not magic, it’s no complicated, and it does not take years to master. In fact, you can comfortably figure out how roadbook navigation works within a day or two -in the end, it’s just about keeping an eye on your miles and the information in the roadbook.
But let’s begin at the beginning.
What is a Roadbook?
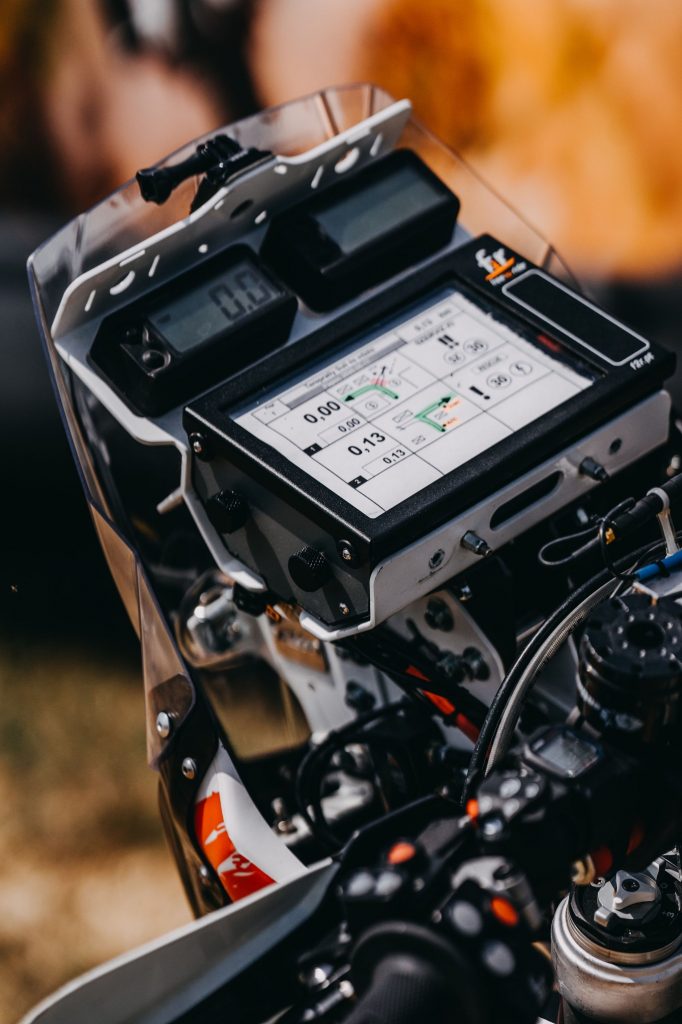
A roadbook is, essentially, a chart roll divided into sections for each significant milepost. In the first section on the left, you’ve got your kilometers; in the middle section, you’ve got your direction; and in the third section on the right, you have your extra information (holes, danger, trees, and so on).
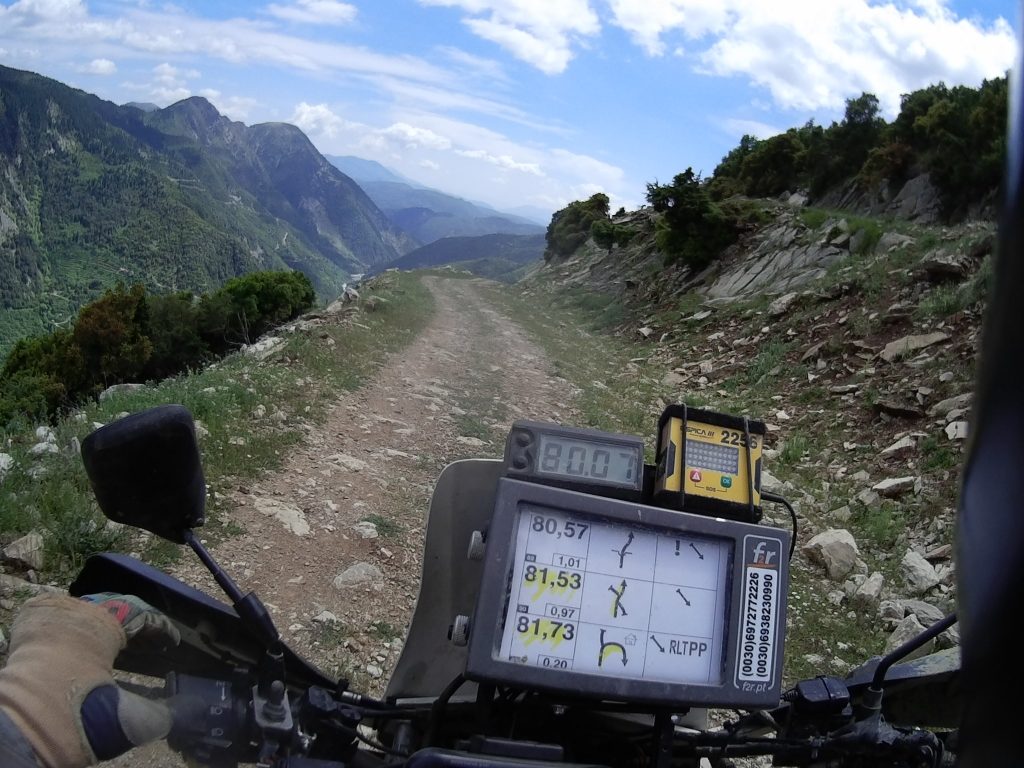
In the example above, if you look in the middle, your left section says “81,53”, your second section has a squiggly line pointing forward, and your third section has a downward arrow. This means that at Kilometer 81,53 you need to keep straght on the main road, and it will be sloping downwards.
Cool, but how do you know when Kilometer 81,53 will roll on? Above your roadbook holder, you see the black device on the left. That’s your tripmaster – a unit that measures your distance. So when the tripmaster shows Kilometer 81,53, you should be on the lookout for that main track and the downward slope.
This is a very simple example; typically, the third section of your roadbook contains more information and more symbols and abbreviations you’ll need to learn, and you can find them here. However, don’t worry if you don’t learn them all by heart for the first time: for your first rally, you just need to keep an eye on your kilometers, get your direction right, and use as much information in the third section as you need.
But What If I Get Lost?
Let’s say you were supposed to turn left at kilometer 20, but you missed the turn, and now, it’s Kilometer 26, and you’ve no idea where you are. What do you do? First, breathe and have a sip of water – decisions made in panic are rarely good. Then, turn around and ride back to the place you certainly recognize – perhaps that fork in the road at Kilometer 12 you definitely remember. When you find it, turn your tripmaster back to KM 12, and start again.
CAP Headings
If you watch the Dakar riders, you’ll notice they talk about CAP headings and other mysterious stuff; because they race in the open desert where there sometimes are no trees, tracks, or any other landmarks to help them navigate, they need to use compass headings to find a way. You don’t need to worry about any of this just yet: if you’re doing your first rally race, chances are, it’ll mostly be tracks, and you will not need the CAP headings to find your way. Just focus on your roadbook and hone the skill or reading and riding at the same time.
Roadbook Equipment
When it comes to roadbook equipment, keep it simple. Get yourself a roadbook holder and a tripmaster, stick everything on your handlebars, and go race. Alternatively, you can choose a digital roadbook; for this, you’ll just need a solid tablet and a good mount. Whether you go classic Dakar style or modern-day digital roadbook, don’t go overboard with equipment at first – instead, try a rally, see what happens, and start obsessing about navigation towers then.
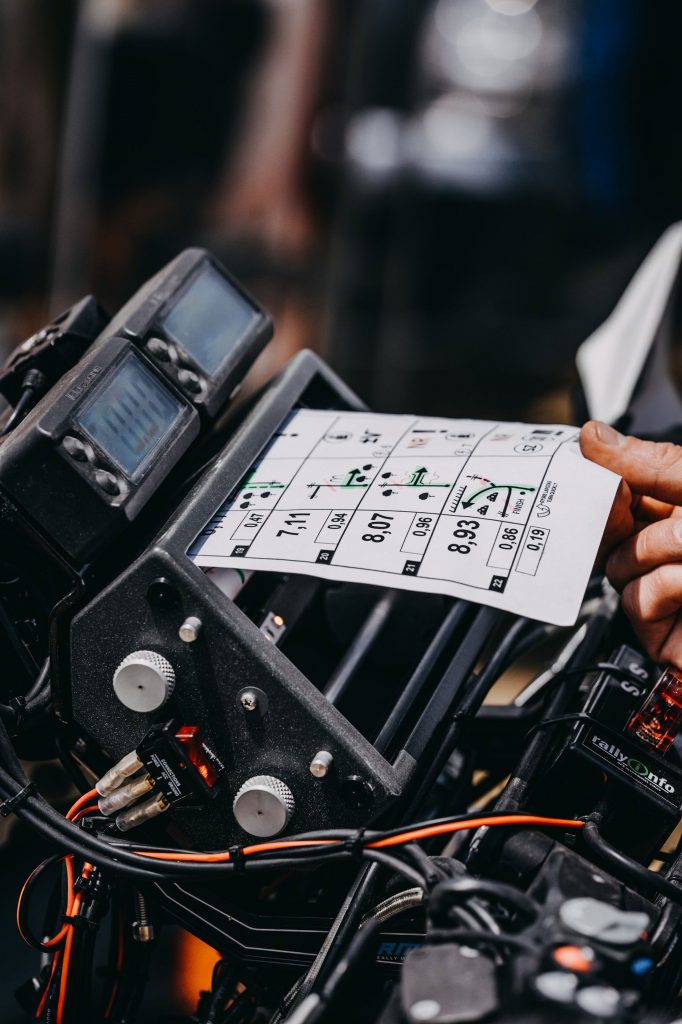
Marking Your Roadbook
At the rally bivoauc, you will see swaths of riders huddled together armed with colored markers working on their roadbooks. What they’re doing is marking points that are important to them, for example, danger points, sharp turns, and the like. If you’re doing a rally for the first time, don’t mark your roadbook too much, because too much information and markings will only slow you down. Only mark changes in direction so you don’t miss turns, and circle danger points so you don’t fly off a cliff. Which colors is entirely up to you, but generally, green works good for changes in direction, and red is for danger.
If you get a pre-marked roadbook, go through it anyway. A roadbook tells you what the tracks will be like, how many fast sections you’ve got (longer sections without changes of direction), and so on, and you can still mark points that are important to you.
The best way to learn roadbook navigation is taking a day or two-day course at a rally school, but if you can’t do that, create your own roadbooks with Rally Navigator and practice on your own.
Pingback: Roadbook Navigation Kits // Cross Country Adventures
Pingback: Surviving Hellas Rally Raid as a Newbie // Cross Country ADV
Pingback: From Riding the TET to Racing a Rally // Cross Country ADV